

SWIMMING STROKES
Features common to all strokes:
a. Curved pathway the hands are pulled in a curved pathway in order to contact 'still water'. If a hand pulls or pushes in a straight line little propulsion will result because the hand is moving against water which is already moving. If a pitched hand is used as well a more efficient forward movement is produced.
b. Pitch of ands in all strokes efficient swimmers use sculling actions, as they pull through the water in a curved pattern. The hands should be:
- Flat not cupped
- Pitched at an angle of 30 4 5 degrees in relation to the path through the water
c. Hand entry and exit:
The hands should enter and exit the water cleanly. The hands should enter the water at an angle to prevent dragging air bubbles under the water as this will decrease the lift which can be obtained. Hands should enter the water cleanly to avoid pulling the water down.
d. Pull and Push Phase:
The arms should progressively bend and straighten during these phases. There should be a high elbow when swimming on the front and a low elbow when swimming on the back.
e. Streamlined body position:
A horizontal, straight and streamlined body position should be maintained to reduce water resistance. Lateral movement [sideways movement] should also be kept to a minimum - this is often is caused by having a wide arm recovery.
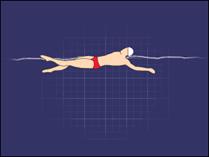
Front Crawl (Freestyle)
Body Position
a. Body is on the front, flat, streamlined
b. The water line should be the top of the forehead
Leg action
The main functions of the leg action are to hold the body in a stable streamlined position and to help with forward propulsion. The main features of the leg action are
a. Rhythmical up and down movements from the hip
b. Legs are relaxed, slightly bent and toes pointed.
c. Ankles are kept flexible and loose
d. Feet should just chum the surface of the water - heels to the surface
Arm action
The arm provides the most propulsion in the front crawl.
The main features are:
a. One hand enters the water in front of the 'same' shoulder, thumb first and pitched at an angle of 45 degrees to prevent pulling bubbles under the water
b. The hands pull backwards in an 'S' shaped pathway. At the end of the pull phase the elbow should be bent at approximately 90 degrees
c. Throughout the pull the elbow is higher than the hand
d. After half way the elbow is straightened by pushing the hand backwards and outwards past the hips
e. In recovery the elbow is carried high with the hand close to the body and the water surface. Keep the wrist under the elbow
Breathing
The main feature is that the head should roll with the body rather than be lifted out of water:
Breathing should be
A. Started as the recovery arm enters the water
B. Be through the mouth and the nose
Breathing out should be
a. Start immediately the mouth leaves the surface
b. Continue non-stop until the mouth returns to the surface.
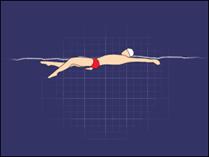
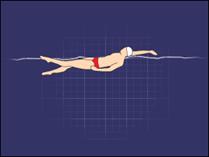
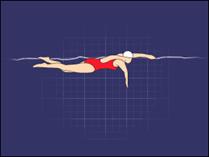
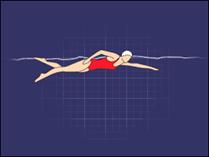
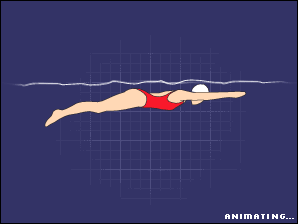
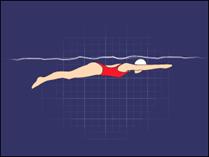
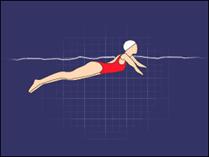
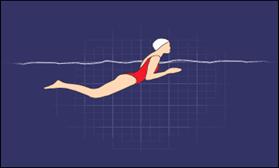
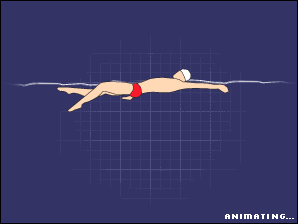
Front crawl basics:
Front crawl is the fastest stroke and gives you the feeling of being powerful in the water. It is often hard to get the hang of at first because fitting in the breathing can be difficult. |
STEP ONE |
STEP TWO |
STEP THREE |
STEP FOUR |
STEP FIVE |


BREASTSTROKE
This is the oldest of the four modern competitive strokes and one which is used by swimmers of all abilities. However, for various reasons it is the slowest of the strokes.
Unlike the other competitive strokes, breaststroke derives great propulsive effect from the strong thrust of the legs against the water.
Body Position:
For most effective streamlining a near-horizontal body position is desirable. However, to permit the leg action in breaststroke to take place beneath the surface of the water, some adjustment has to be made to this position.
In order to maintain as streamlined a position as possible, as the arm pull takes place the legs should remain in a trailing, extended position (Figure 2).
Leg Action:
Two types of leg action are in use:
a) The preferred action is a narrow whip-like action used by most competitive swimmers and quite naturally adopted by some beginners
b) Recreational swimmers tend to adopt a wide wedge-type action but this is not recommended
Arm Action:
The natural stroke has a continuous circling action without any pause or glide the arm action has two main variations:
a) A bent arm pulls with a high elbow used by most competitive swimmers (Figure 8).
b) Recreational swimmers and beginners tend naturally to adopt a straight arm pull (Figure 9).
Breathing:
There is a wide choice in the techniques of breathing in this stroke. Although this may not be of any great consequence to the average performer, the position of the head during breathing can influence the stroke considerably.
Variations in the timing of the breathing are:
a) Early breathing. The head is lifted as the arms complete the recovery phase and inhalation takes places during the glide or at the beginning of the arm pull.
b) Mid-way breathing. In this pattern of breathing the head is lifted in the mid-way part of the arm pull.
c) Late breathing. This is the one invariably used by competitive swimmers, inhalation taking place between the end of the propulsive phase and the start of the recovery phase.
Basic breaststroke
123 |
STEP ONE It is the only stroke which uses these movements and can be difficult to get both legs to do the same thing at the same time. |
STEP TWO |
STEP THREE |
STEP FOUR • start again |

Backstroke
A good stroke for learners because breathing is simple and face is clear of water.
Body position
a. Body is stretched on the back in a streamlined position, hips are high
b. Tilting the head adjusts body position
c. Head should be steady but good backstrokes roll - lift shoulder out of water
Leg Action
1-Should be continuous, alternating wave action
2-Only toes, not the knees break the water
3-Ankles and knees flexible
Arm Action
a. Back of the hand comes out of water first
b. Hand re- enters the water little finger first, directly behind the 'same' shoulder
c. The shoulder roll will assist hand 'depth' Orientation Curriculum Guidelines
d. At the beginning of the pull the elbow begins to bend, pointing downwards
e. As the hand passes the shoulder the elbow bend is approximately 90 degrees. And this is when the push starts
f. Elbow straightens during the push which is backwards and downwards.
g. Recovery over the water is relaxed, but with a straight arm, palms facing sideways.
Breathing:
Should be natural with inhalation and exhalation with alternate arms.
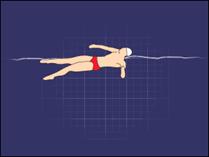
Backstroke for beginners
123 |
STEP ONE |
STEP TWO Once your hand is in the water it should push down and towards your feet. Bend your elbow slightly and pull your arm by your side to your thigh. The left and right arms do the same movement, but not at the same time. One should come out of the water at about the same time as the other enters it. |

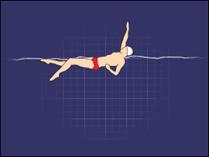
Intermediate back crawl
|
STEP ONE |
STEP TWO |
STEP THREE |
STEP FOUR |
STEP FIVE |